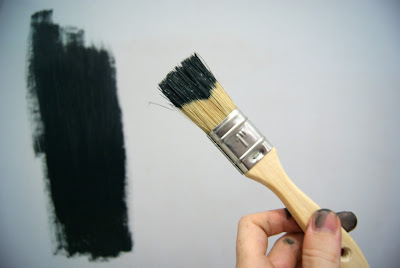
I am so excited that I finally did this. I fell in love with the idea as soon as I signed over all of my spare time to Pinterest. Turning
anything into a chalkboard?? Don't mind if I do.
Where we live, there's no such thing as buying pre-made chalkboard paint. I don't really think the chalkboard craze has made it to this part of the world yet...and it probably never will. Therefore, I'm that crazy chick waving her chalkboard wand over everything in the house and chanting "bibbity bobbity CHALKBOARD!"
The recipe for
pure crafting joy chalkboard paint is simple.
2 Tbsp un-sanded grout for every one cup of latex matte paint (whatever color you like!)
It's recommended that you only mix a cup at a time. I only made a one-cup batch to paint a 6.5' by 3' space on Little Man's wall and I didn't even finish off that one cup. So that means you probably don't want to buy too much of one paint color unless you plan to paint a
lot of things with that paint (or spread the joy and share with your friends)!
Here's the back story of why I decided that having a spot in Little Man's room for a chalkboard wall might be beneficial:
Need I say more?
He's recently found his artistic gene that his mommy passed onto him while he was in the womb. I really am so proud of his artwork but...well...the brown crayon wasn't really jiving with the blue/gray wall color.
To begin my endeavor to give him a "workspace", I taped off the area of his wall that I wanted to paint. There were still remnants of his artwork leftover, so I basically applied the tape a few more inches higher than he previous artwork. I then decided to make the width completely cover the space from the door to the corner of the next wall.
If you look closely, within the taped off area, you can see a faint brown smear from my attempt to clean off the crayon several weeks ago. That being said, it might be a good idea to wipe down the area that you've taped off, just to remove any dust, dirt, and grime.
Now you paint! It's a scary step to take...especially if you choose the color black. I used a brush for the whole wall because nobody uses a roller here. They don't even sell rollers (if they do, the price is way too high). Crazy, huh? The painters who painted all of our walls when we moved in only used a paintbrush. It was insane. All that to say, if you have a roller, it might help to use that so that the paint gets on the wall evenly. If you use a paintbrush, I recommend using vertical and horizontal strokes.
Almost finished...
The paint dries super fast, so one thing I did was I back-tracked a little as I painted and touched up spots that still need a little extra coverage.
Here we have the not-quite-finished product.
It will have that crisp, clean-slate look that all teachers love. However, this chalkboard wall must now be "conditioned".
This is done by rubbing a piece of chalk, on its side, over the whole chalkboard area. The Mr. and Little Man joined in on the fun!
Once you've completed that task, you simply wipe it off. Some other tutorials will say to use a slightly damp cloth but I'm going to tell you something different (and better) to use....
Ready for the trick?
Magic Eraser!
Once you're finished with that, your chalkboard wall is complete and ready to be drawn on!
Later I'm going to have the Mr. hang these cute buckets I bought from IKEA. That way, Little Man has a place to put his pieces of chalk and eraser.
These actually hang perfectly on the same rod that I bought from IKEA which hangs above
my desk.
I hope this tutorial was helpful. If it was, I'd love for you to pin it and share it with others! You can receive updates on other DIY projects that I do by following this blog, subscribing via email and liking "A Sweet Fragrance" on !


wonderful tutorial. Thank you for sharing at the Thursday Favorite Things blog hop. I featured you on facebook! xo
ReplyDeleteThank you for sharing, Katherine! I'm looking forward to being a part of Thursday's blog hop :-)
DeleteI love the idea of doing this when I have kids one day! Shoot, I wouldn't mind one for myself;)
ReplyDeleteCheers,
Alyson
You TOTALLY need to make one for yourself! No need to wait for kids. I'm already scheming about all the other places and things I want to paint with my chalkboard paint (shhh...don't tell my husband) ;-)
DeleteI'm seriously tempted to paint the bottom 4 feet of all walls in our house with chalkboard paint. Kids and light walls don't mix... I'm learning the hard way. I want to put a chalkboard wall somewhere in our house, but I'm not sure where. Can't wait to give this a try! Thanks for linking up at the Pin it Monday hop! -Emily
ReplyDeleteHaha, I almost wish I could do the same thing. I'm constantly using a magic eraser on the rest of our walls. I am trying to figure out where I want to do a chalkboard space in the kitchen. It just seems like a good place to have something chalkboard-y :-)
DeleteOH NO! Nice cover up with the chalkboard wall! I'm just waiting for my daughter to write on the walls.
ReplyDeleteThanks for sharing at the Frugal Crafty Home Blog Hop. Have a wonderful day!
Katie @ TheCasualCraftlete.com
It's funny. My son had actually drawn on some walls in the living room that same night. My husband said, "Maybe we should give him a spot to draw." I was walking into my son's room and responding, "Yeah, I was actually thinking about giving him a chalkboard wall right..."
Delete...and that's when I saw his artwork ;-)
Thanks for the comment!